| Environment | Purpose |
|---|---|
| Development (Dev) | Feature development |
| Pre-Production (PreProd) | Validation and user acceptance |
| Production (Prod) | Live environment |


Roberto
Hernández
Jiménez
As Microsoft Fabric projects grow in complexity, managing changes across development, testing, and production environments becomes increasingly challenging. Data engineers and analytics teams need a reliable way to promote changes, maintain version control, validate features before release, and ensure production stability.
Continuous Integration (CI) and Continuous Deployment (CD) are established practices that help development teams automate and standardize these processes. However, implementing CI/CD in Microsoft Fabric introduces unique considerations, as not every Fabric item supports deployment in the same way, and different deployment mechanisms provide varying levels of functionality.
In this tutorial, we will build a complete CI/CD workflow for Microsoft Fabric using Azure DevOps and the Microsoft-supported fabric-cicd deployment framework. Through a realistic supply chain scenario, we will demonstrate how to:
By the end, you will have a repeatable framework that can be adapted to real-world Fabric projects.
Continuous Integration is the practice of continuously incorporating code and solution changes into a shared repository. Changes are versioned, tracked, and validated before being promoted to higher environments.
In Microsoft Fabric, CI is commonly achieved using Git Integration, where workspace items are synchronized with a source control repository in Azure DevOps or GitHub.
Continuous Deployment focuses on moving approved changes from one environment to another through automated deployment pipelines.
For Fabric projects, CD can involve:
Without CI/CD:
With CI/CD:
There is no single deployment strategy that supports every Fabric artifact equally.
Pros
Cons
The fabric-cicd is a Python library designed to deploy Microsoft Fabric items from a repository into a workspace.
Pros
Cons
Pros
Cons
In practice, many organizations use a hybrid approach because some Fabric items may require additional manual configuration after deployment.
Important: CI, deployment, and post-deployment configuration are three separate concerns. Some items may still require manual configuration after deployment, such as permissions, connections, credentials, or environment-specific settings.
This tutorial uses Azure DevOps as the deployment orchestrator while Microsoft Fabric serves as the analytics platform.
Figure 1. High level of CI/CD Architecture using Azure DevOps.
The architecture follows these principles:
Developers work on features and items in the Development (Dev) Workspace in Fabric and changes are synced to the Dev branch in Azure DevOps. When features or items are ready for testing, a PR (Pull Request) is created to merge the Dev branch into the Pre Production (PreProd) branch, which, upon approval, triggers the item deployment through the Azure DevOps deployment pipeline, which includes item type selection and approval gates configured in Azure DevOps environments.
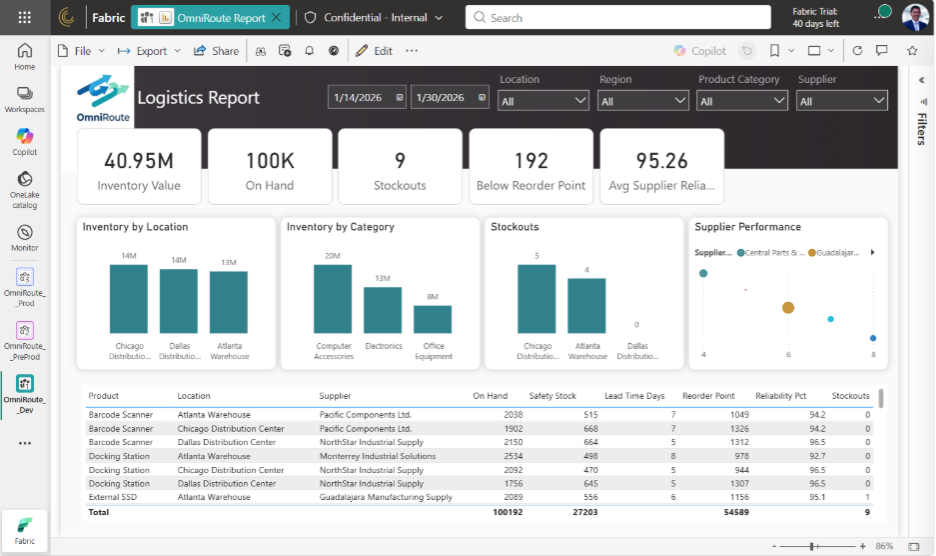
To demonstrate the deployment process, we will use a fictional company named OmniRoute Logistics.
OmniRoute transports:
across multiple warehouses located throughout the United States.
Developers work with limited datasets in Development, while broader datasets are available in Pre-Production and Production environments.
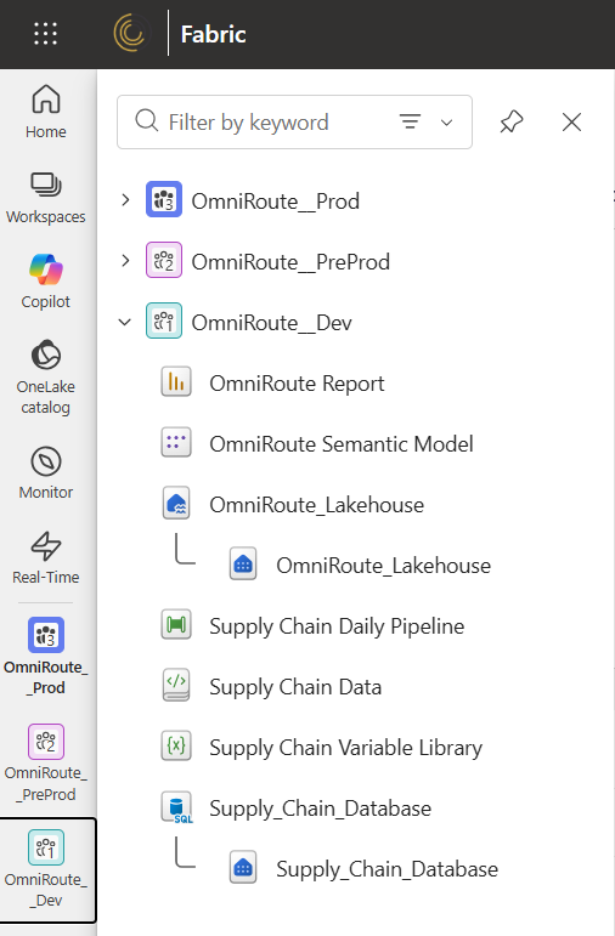
This tutorial uses three environments:
Table 1. Environment distribution.
Table 2. Workspace distribution.
We will work with three Workspaces only. If a Medallion Architecture is implemented, more Workspaces are needed. That is outside the scope of this tutorial.
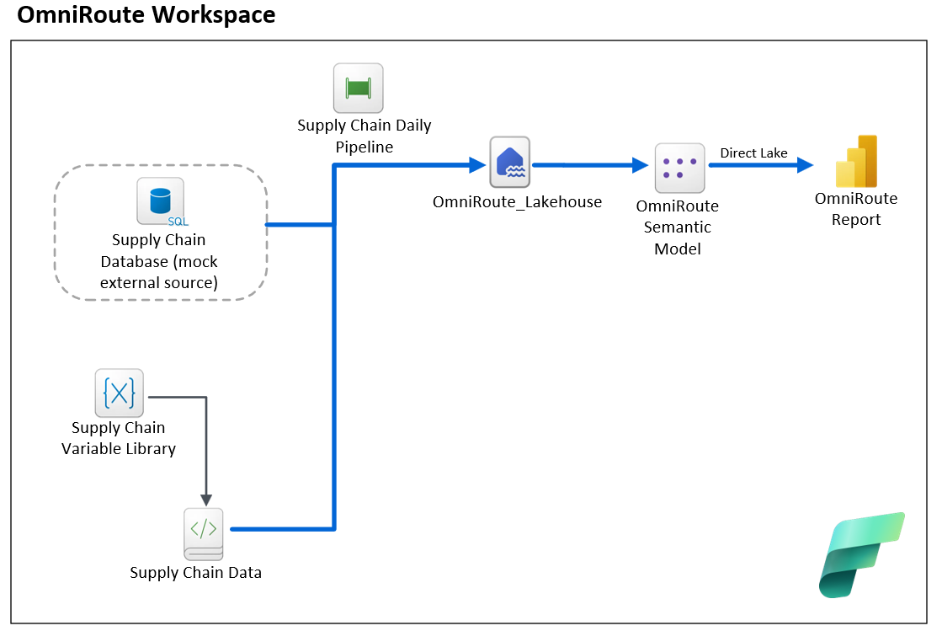
The Fabric solution contains several interconnected items, listed in Table 3.
Table 3. Fabric Items in the OmniRoute Workspace.
To follow along this tutorial, you can manually create the Fabric items or you can download all the Fabric configuration from the following repository:
You can also simplify or customize to your use case.
The first objective is to connect the Development workspace with Azure DevOps.
If you are following this tutorial, it is recommended to keep the same names of the resources, but you can use any names if you prefer. Also, the Workspace can be empty at the beginning, and any development like creation and configuration of items can be synced later.
In the OmniRoute_Dev Workspace, navigate to Workspace Settings→ Git Integration
Configure:
Then select Connect and Sync.
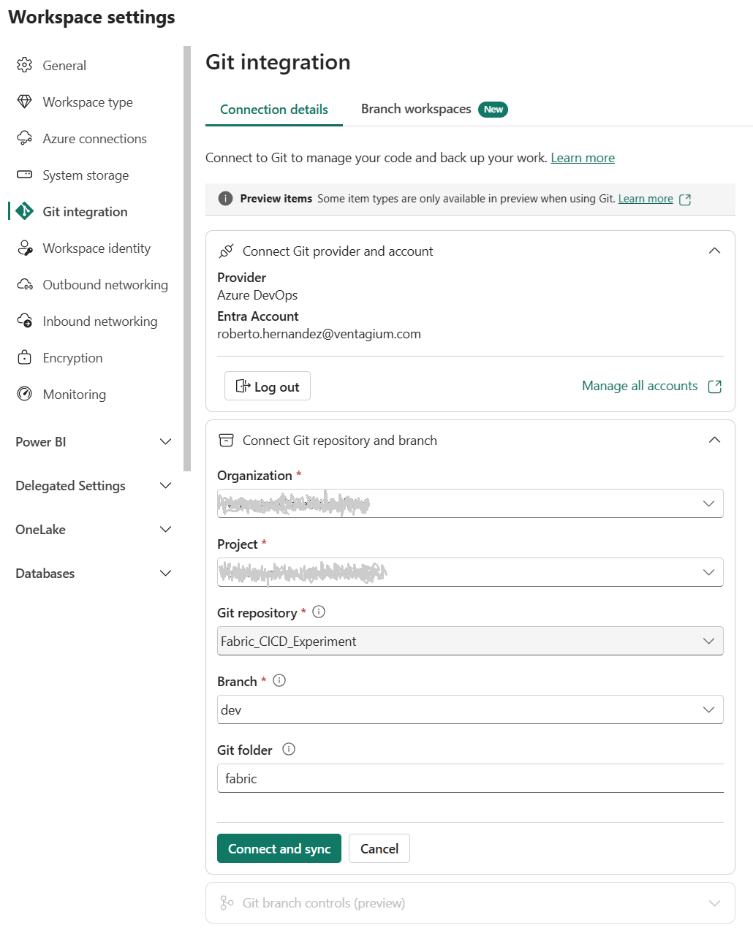
The sync process will begin. The first time, the Fabric data will be sent to the dev branch in the repository. After synchronization:
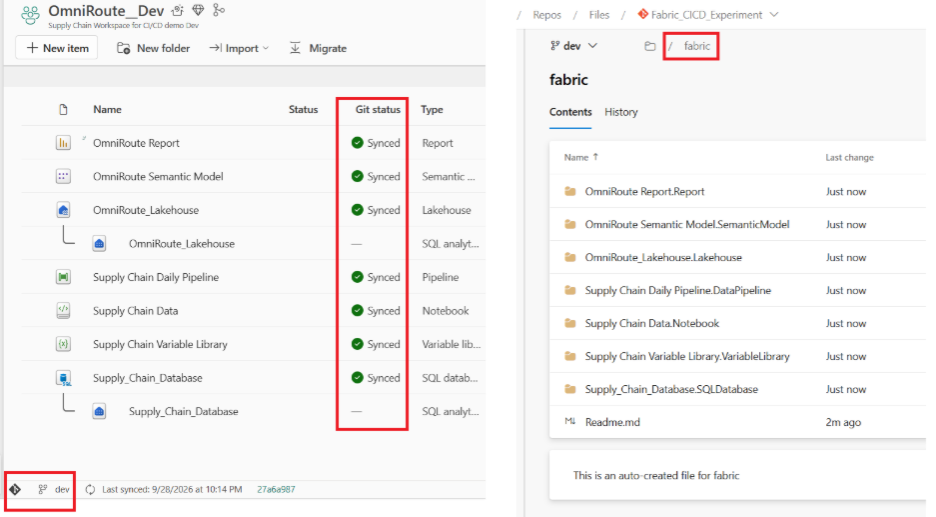
The repository contains three primary branches
Table 4. Fabric Items in the OmniRoute Workspace.
Repeat the same process to create prod from preprod.
In this demo, we will use one single pipeline that will detect the deployment stages and execute accordingly. We will base the deployment solution on the popular deploy-to-fabric.py script release by Microsoft as a starting point (full customization is possible). Also, we will use the deploy-to-fabric.yml yaml pipeline that fully describes the steps that the deployment process should follow, like triggers, parameters, variables, and stages. The final configuration of those files can be obtained in the project repository (LINK to DEV Git).
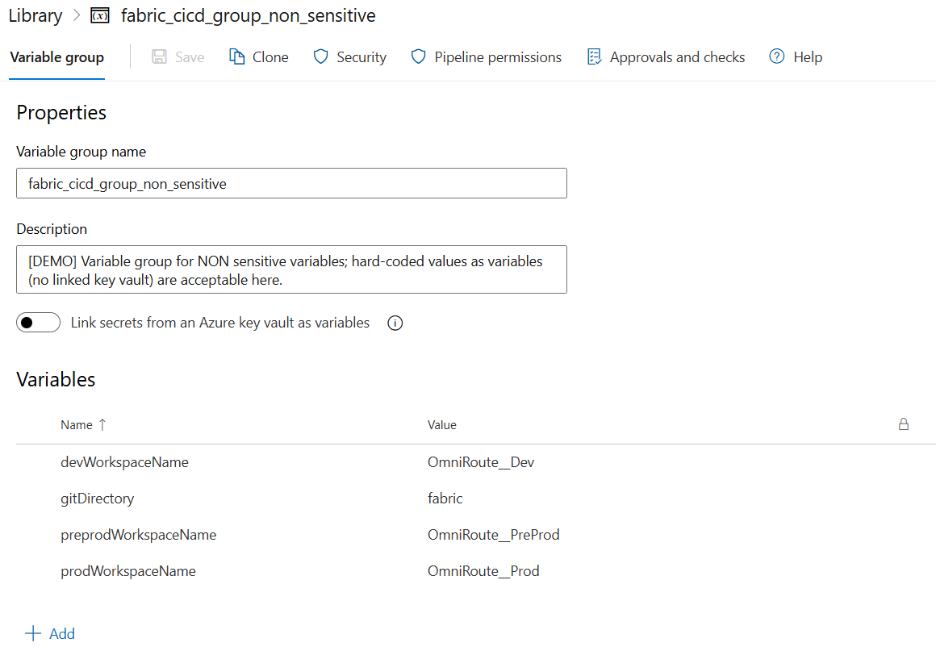
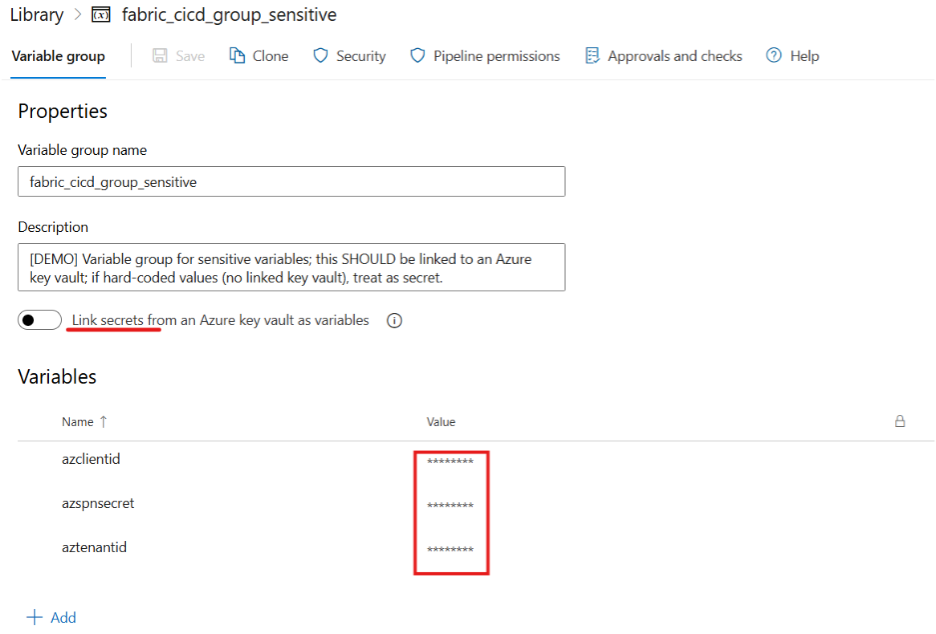
Azure DevOps variable groups centralize pipeline configuration, and we will separate sensitive information from non-sensitive information.
Create the fabric_cicd_group_non_sensitive variable group. For this tutorial, add the following variables:
Table 5. Non-sensitive variables.
These variables will be called by the python script during the deployment process, so it's critical that they are named like this
Create the fabric_cicd_group_sensitive variable group with the following variables:
Table 6. Sensitive variables.
Linking to an Azure key vault is recommended, but hard-coded values as variables (no linked key vault) is also possible; if so, treat variables as secrets in this variable group.
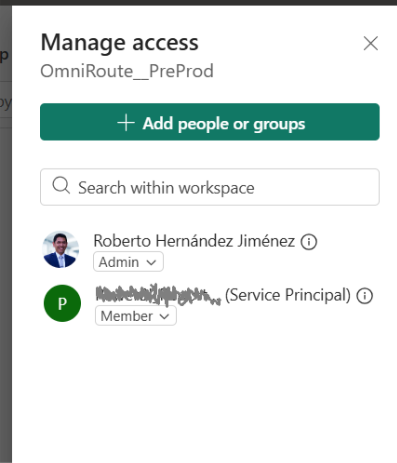
Before deployments can work, the Service Principal must have permission to deploy Fabric items.
Navigate to:
Enable:
Grant the Service Principal Member access to:
This tutorial uses a single YAML deployment pipeline. The pipeline executes the deploy-to-fabric.yml and deploy-to-fabric.py files.
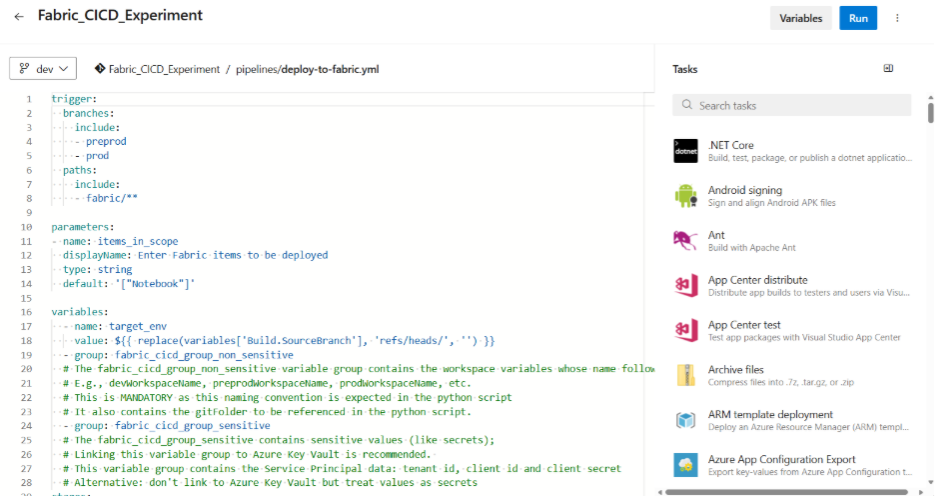
‘[“Notebook”,"DataPipeline","Lakehouse","SemanticModel","Report","VariableLibrary"]'
to include a default list of supported Fabric items to be deployed in that run.
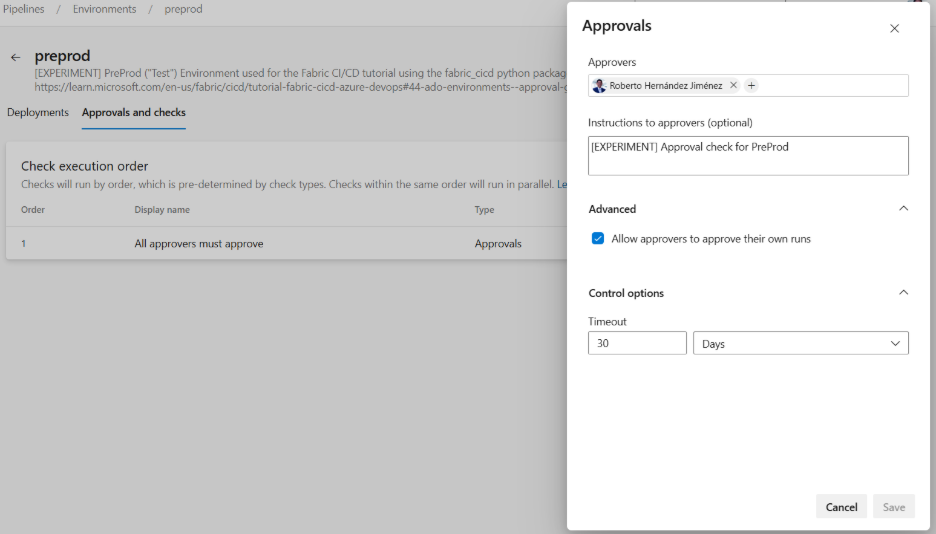
Approval gates introduce governance and release control. We will have 2 Azure DevOps environments that will serve as approval gates when deploying from one stage to the other.
Create the preprod and prod environments under Pipelines>Environments.
For each environment:
The deployment mechanism relies on deploy-to-fabric.py. Important considerations are:
unpublish_all_orphan_items must be used with caution. Disable it if you are unsure of its implications, as it can delete items from the target workspace even if those items are not part of the current release branch.
Always validate the implications before enabling this setting.
There are two deployment approaches:
Navigate to Pipelines > Run Pipeline and select preprod as the target branch.
Use default deployment scope:
["Notebook","DataPipeline","Lakehouse","SemanticModel","Report","VariableLibrary"]
Run. You can see the running state by clicking on the current run. There, approve any requested resources and approval gates.
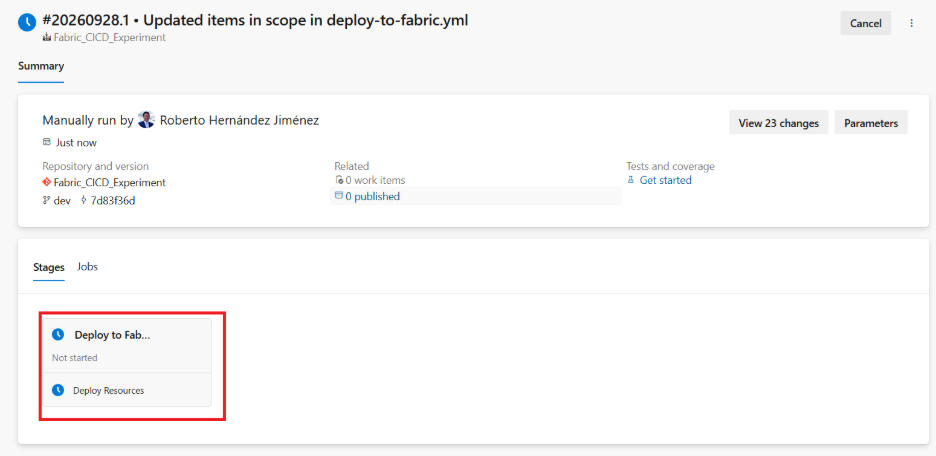

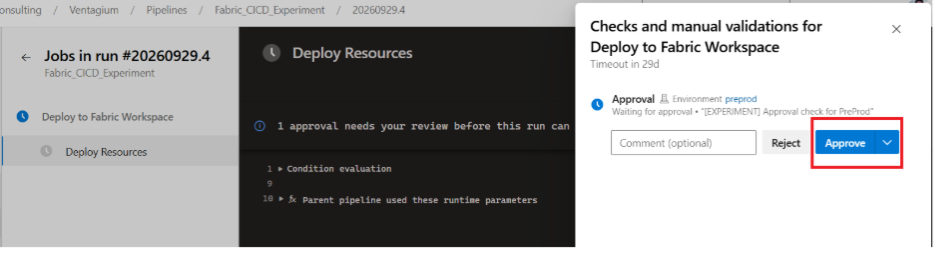
Once completed:
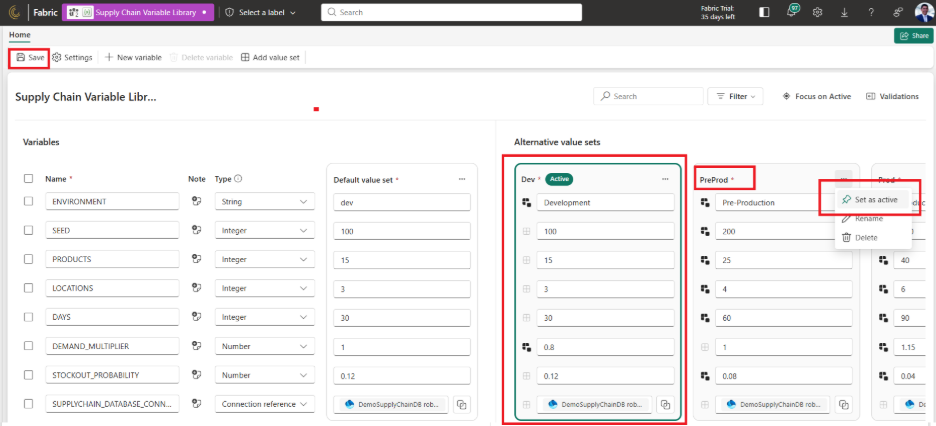
Open the PreProd variable library and activate the PreProd value set. This can also be configured as parameters in the deployment process, but that's outside the scope of this tutorial.
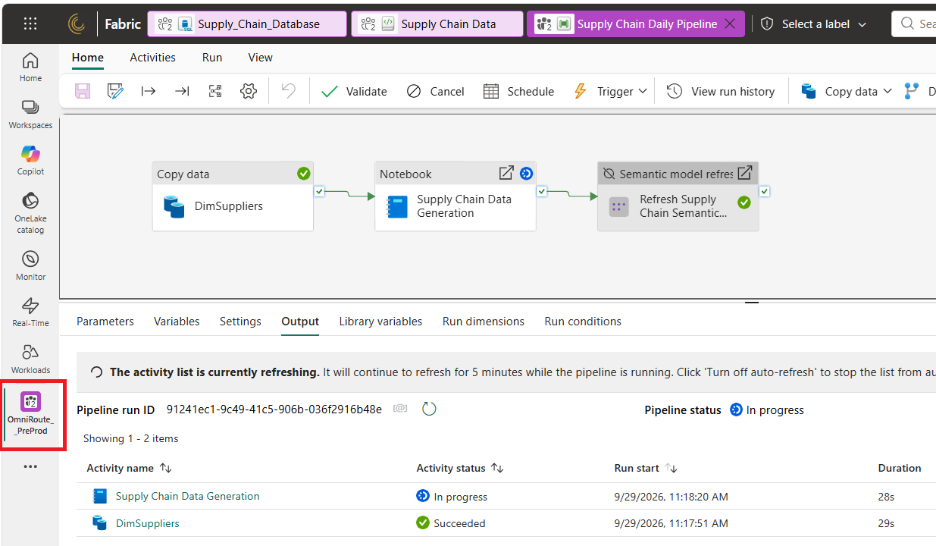
Next, open the Supply Chain Data notebook and add the OmniRoute_Lakehouse as Default lakehouse. This configuration can be also automated in the deployment pipeline using parameters, but that's not in the scope of this demo. Lastly, open the Supply Chain Daily Pipeline pipeline and make sure the connection the Copy Data Activity has, points to the correct source and destination (items in the PreProd Workspace). Then run the pipeline. The Variable Library automatically detects the environment and uses environment-specific settings when the notebook in the pipeline is running.
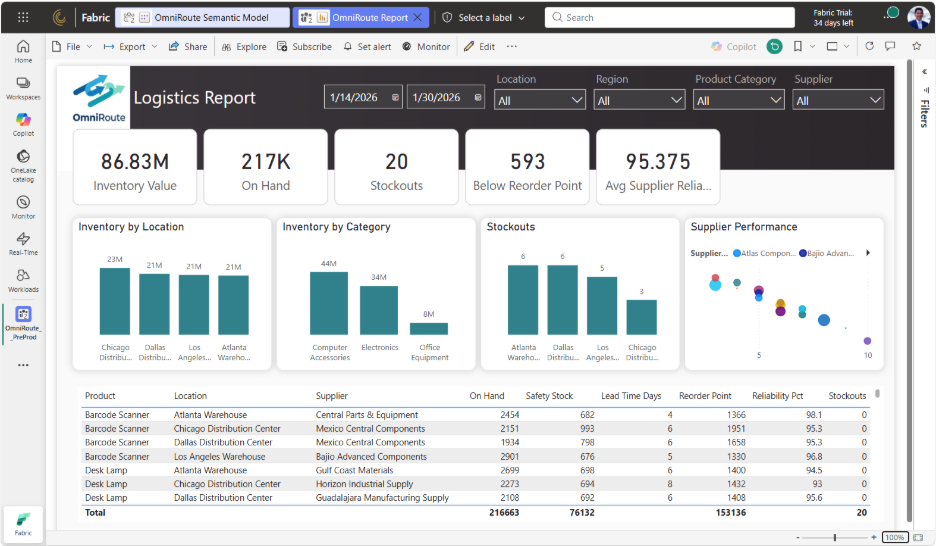
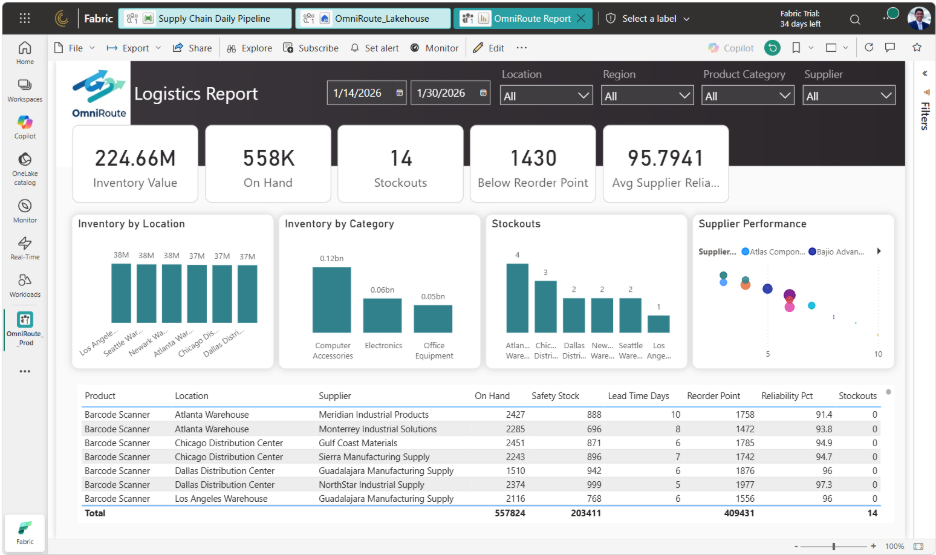
When the pipeline finishes, open the report and verify:
For production-grade workflows, deployments should be triggered through Pull Requests (PR). For example, once testing is completed in the PreProd Workspace, you can request to promote to Production. We will explore so in this demo using Pull Requests.
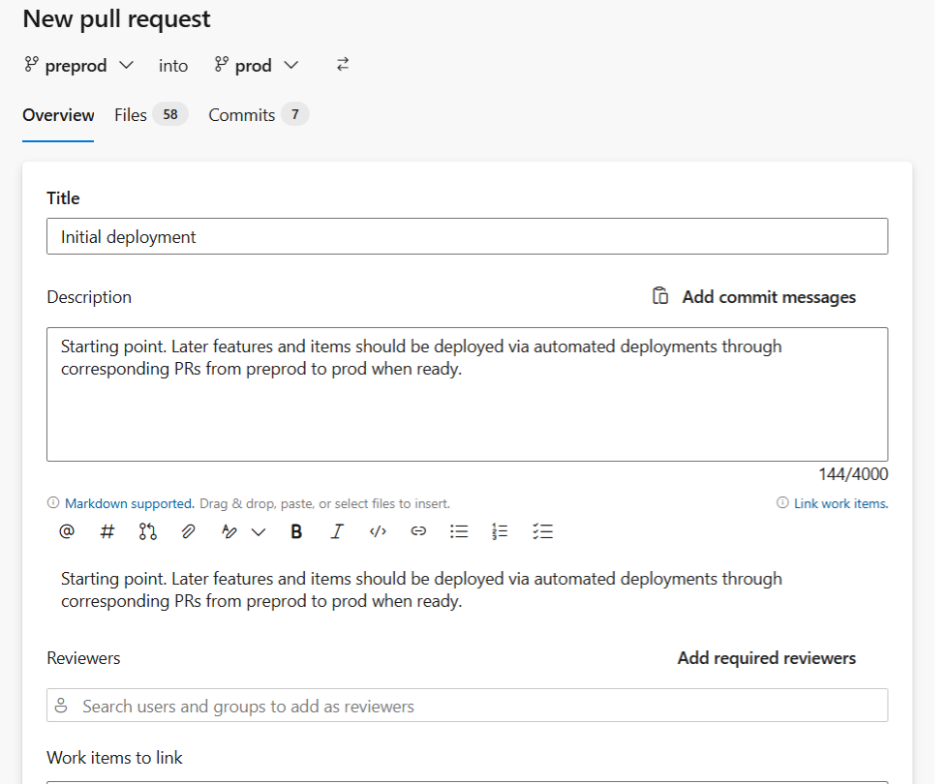
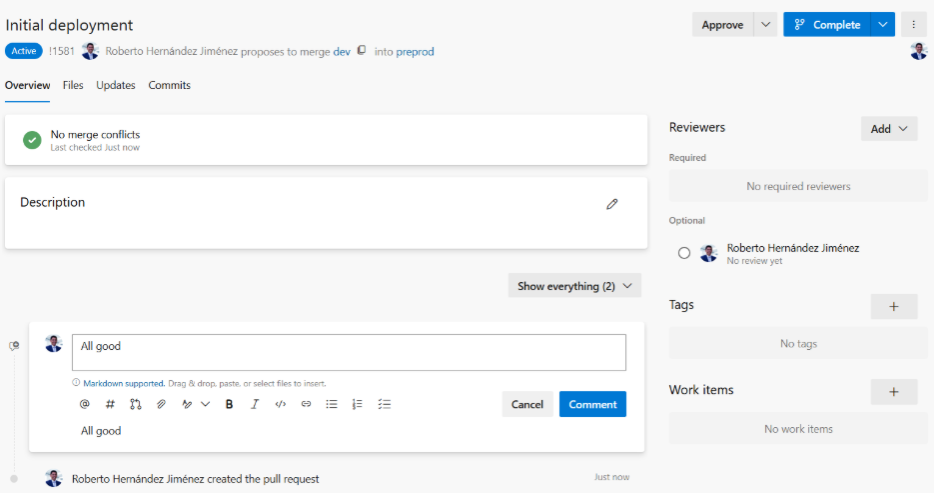
The merge triggers the deployment pipeline automatically.
After approval:
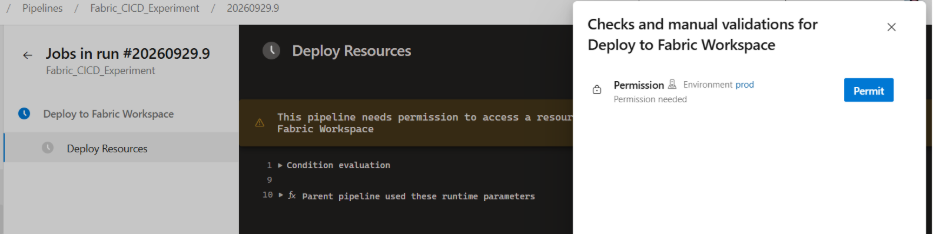
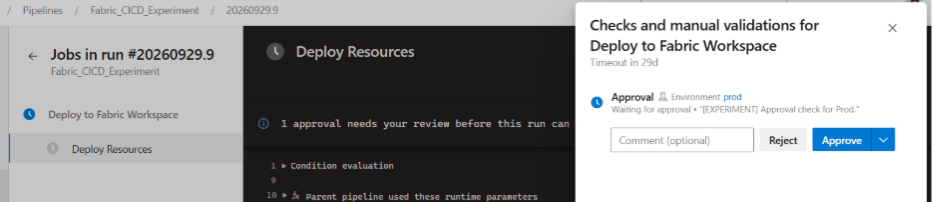
Run any required post-deployment activities:
At the end, you should be able to open the Prod report and see that the data is showing as expected, according to the Production Workspace and connected Production components.
Microsoft Fabric is evolving rapidly, with new features and item types being introduced frequently. However, not all of them have the same level of support across Fabric Deployment Pipelines, Azure DevOps Pipelines using the fabric-cicd Python library, or the Fabric APIs directly. Therefore, a hybrid approach is often necessary.
Some items require manual configuration or additional initialization related to specific settings, such as a Default Lakehouse in a Notebook (if needed), the Active Value Set in Variable Libraries, or connections and credential setup in Data Pipelines and Semantic Models.
For larger projects, parameterization can reduce manual configuration requirements and improve environment portability. Parameterization is supported to some extent by the fabric-cicd Python library, but it is not covered in this tutorial.
The completed solution provides:
✅ Source-controlled Fabric assets
✅ Automated deployment process
✅ Approval-based promotion
✅ Environment-specific configuration
✅ Reduced deployment risk
✅ Repeatable release management
Microsoft Fabric provides several deployment mechanisms, but Azure DevOps combined with the fabric-cicd framework offers one of the most flexible and enterprise-ready approaches currently available.
The strategy demonstrated in this tutorial separates development, validation, and production concerns while maintaining full traceability through Git branches and deployment pipelines. By connecting only the Development workspace to source control and deploying to higher environments through automation, organizations can reduce operational risks while gaining visibility into release history.
It is important to remember that deployment itself is only one part of the release process. Environment-specific configuration, permissions, credentials, semantic model connections, and operational validation may still require additional steps. Planning for those activities early is essential to achieving a fully reliable deployment process.
For teams adopting Microsoft Fabric at scale, this CI/CD pattern provides a solid foundation that can be expanded with automated testing, parameterization, advanced release governance, and Infrastructure-as-Code practices.